The Clean and Jerk: Breaking Down the Phases
TOPIC: Exercise guides | Strength & Conditioning
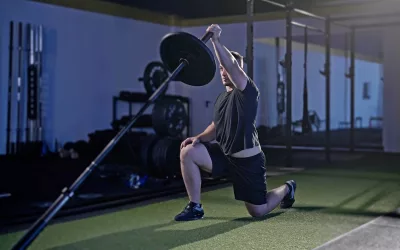
The clean and jerk is a complex and technical weightlifting movement that requires a solid level of skill and strength. It is a two-part lift that involves lifting a barbell from the ground to the shoulders (the clean), then locking out the barbell overhead (the jerk).
The clean and jerk is one of the two lifts contested in the sport of weightlifting, along with the snatch. In this article, we will take a detailed look at the different phases of the clean and jerk and how to perform each phase correctly.

Written By
brian chambers
Brian Chambers is the owner and head coach of Big Bend Strength, an online resource for olympic weightlifting and strength training. Big Bend Strength has produced athletes at the state, national, and international level in weightlifting since 2017. In this blog, he breaks down the clean and jerk piece by piece.
Insta
Website
Programs
How to Clean Like an Olympic Athlete
We’re going to focus on the full squat clean, not the power clean or split clean or any other variation. The squat clean is the most common and efficient method for moving the most weight possible.
Don’t be fooled by watching the pros make it look easy. There are actually five main phases of the clean:
- The setup
- The first pull
- The second pull
- The third pull
- And the squat
It’s important to understand that while there are broad techniques most athletes can apply to their training, you should work on the fine details with a coach if possible.
The Set Up
How you set up for a clean will vary somewhat based on your proportions. A good rule of thumb here is that when viewed from the side, the lifter’s hips should be higher than the knees, the shoulders above the hips, and in front of the bar, the elbow pits rotated in, and most importantly mid-foot pressure.
Those with longer legs may have higher hips and a wider stance, while those with shorter legs may have their hips lower and stance narrower. I suggest experimenting to see what feels the best for you!
The First Pull
The first pull is generally referred to as the pull from the ground until the bar passes the knee. The main priority of the first pull is to not let the bar move forward off the ground and to maintain the same torso angle from the ground to the knee. I prefer to think of this as the “first push” as most people let their hips rise too fast — imagining this as pushing against the ground with your legs helps fix this issue.
In order to prevent the bar from moving forward around your knees, you need to move your knees back out of the way WITHOUT letting your balance shift back to your heels or letting your toes lift. This will help you get a better drive with the legs as you transition to the second pull.
One way to isolate and work on your first pull is with the tempo clean. By slowing down the pull, you can notice and fix things you normally speed through, which has a ton of potential to clean up your technique.
The Second Pull
The second pull happens as the lifter transitions from right above the knee until the extension of the legs (around hip-height). The main goal is to get your knees under the bar enough to have optimal leg drive while still keeping your shoulders in front of the bar. As the bar crosses your knees after the first pull, you’ll need to push your knees forward under the bar without leaning your torso back behind the bar. This solves both of the main priorities of the second pull and allows for maximal leg drive.
This also leads to a more vertical bar path, preventing athletes from pushing the bar away with the hips, resulting in a loopy bar path. A good cue is to try to make your hips AND knees extend at the same time, not hips first, then knees. One drill you can use to work on this is the double pause clean. By stopping above the knee, you can isolate the second pull and make any changes to your normal technique. This solves many issues in the second pull, helping with your power output.
The Third Pull
The third pull can be tricky to understand, but it’s the difference between elite lifts and amateur ones. The third pull happens from the top of the extension to the bottom of the squat. The goal of the third pull is not to elevate the bar any higher, but to use the moment of weightlessness it has at the peak of its height to pull yourself under the bar.
The idea here is that instead of pull, drop, catch, we’re much faster if we pull OURSELVES under the bar. This allows us to meet the bar better instead of having it crash on us at the bottom making the squat much easier to recover from.
Another goal of the third pull is to keep the bar close to the body as we pull under. Rotating the elbows as I mentioned in the set-up portion of the article will make a big difference with this. One way you can practice this is with the tall clean, which is a great drill to learn how to keep the bar close AND has the added benefit of helping improve speed under the bar!
The Squat
Once you land in the bottom of a front squat, you’ll need to stand the weight up to complete the clean. This is a good chance to talk about foot movement. Most people should start with a closer pulling stance, then move their feet out at the top of the extension (third pull) and land in their squat stance. Doing this will help make the squat feel easier and set you up for a better jerk.
Perhaps the biggest key to making the squat feel easy is to meet the bar on the way down with braced abs. These two things allow you to ride the bounce of the squat rather than get pinned at the bottom and be forced to pause-front squat it up and waste a ton of energy on the recovery. Check out this video for a quick front squat tutorial!
Dialing in Your Split Jerk
Let’s focus on the split jerk rather than the push, power, or squat jerk. Most athletes use the split jerk in competition as it has the highest ratio of efficiency:room-for-error.
There are five main phases of the split jerk:
- Rack position
- Dip
- Drive
- Transition to split
- Recovery
Rack Position
The rack position for the jerk is sometimes different from that of the clean/front squat. The main priority is keeping a vertical torso and choosing an elbow height that allows you to stay vertical in the dip and drive. While most coaches universally agree, high-as-possible is the best elbow height for the clean, there is much more wiggle room for the jerk.
My personal preference is lower elbows with the shoulders pushed forward, and the bar resting in the palms while behind the delts and in front of the collarbone. You should generally choose a grip on the barbell that’s easy to transition to from the clean. Either the same or slightly wider than your clean grip works for most athletes. This allows you to have the most efficient punch under the bar (though your mobility and proportions may force higher elbow height or a bar placement further toward the fingertips).
Stance is less important, but for most people, I recommend choosing a stance that is wide enough to prevent falling forward in the dip, but not too wide where you lose out on power output. This takes some experimentation. As always, try it for yourself and find what works best for you!
The Dip
The dip is where most mistakes are made in the lift. The dip takes place from the standing rack position to the lowest point the bar goes by bending into your knees. The main priorities of the dip are to keep the torso completely vertical, to control the timing of the dip, and to control the height of the dip.
Most issues in the jerk can be solved by focusing on these main points. If you’re falling forward in the dip, you will likely push the bar forward overhead. If you dip too suddenly, you’ll likely begin the drive too slowly and have the bar crash on you at the bottom of the lift. If you dip too low, you’ll likely fall forward at the bottom of the dip.
One drill you can use to nail your dip technique is the pause jerk + jerk complex, which allows you to fix any issues in the dip before completing the rest of the lift!
The Drive
The drive is often not an issue if the dip was perfect, however, there are a few things you’ll want to focus on. The drive happens from the lowest point in the dip to the highest point of the barbell. The goal of the drive is to maintain a vertical torso, to make the legs do 100% of the work to elevate the bar, and to time the punch under correctly.
While it is mainly a priority in the dip to keep the torso vertical, and not often a huge problem to drive forward out of a vertical dip, it’s still something you should be aware of. A good cue is to drive through the heels as much as possible which should stop you from leaning forward in the drive.
In order to make your legs do the work, your arms should be relatively relaxed throughout the dip and drive. Rely on your legs for the upward power. Only once the bar has reached maximum height do your arms actually take on any weight, but that is for the next phase. If you focus on these cues, you’ll have a TON of success with all variations of the jerk.
The Transition To Split
Once you’ve launched the bar from your shoulders to its highest position in space, you’ll need some fancy footwork to land in a split position. The success of this phase of the lift is largely based on two things; timing of your arms, and the speed/balance of your footwork.
If your legs have done the job correctly in the dip phase, then your arms’ should add speed to the lift by punching your body under the bar into the split. Similar to the “pull under” in the third pull of the clean, the “punch under” takes advantage of the weightlessness of the bar at the peak of the drive. Rather than falling under, we can make the lift faster and more controlled by punching ourselves under the bar.
It’s important to note that if your arms begin working too soon before you complete the drive, or too late after the drive, your timing will be off resulting in a press out or loss of speed. If the timing of the punch is something you need to practice, I suggest using the tall jerk as part of your warm-up. This drill is designed to help lifters feel the punch and use their arms/shoulders to create speed under the bar.
When it comes to footwork and balance in the split, there are a lot of variations from lifter to lifter based on proportions (are we seeing a theme here?), but a good rule of thumb is to aim for these main points:
- Vertical front shin
- Bent back knee
- Back heel off the ground
- Balance 50/50 between both legs
- Torso vertical and core braced
One way you can work on just the footwork element of the lift is to practice bodyweight footwork drills. These are low-impact and don’t tax the shoulders, making it easy to get a ton of practice in. By keeping the timing, footwork, and balance in mind, you’ll be an incredibly efficient lifter, and won’t need to rely on a large amount of strength reserves to move big weights.
Recovering The Split
Recovering from the split jerk takes place from the lowest point of the split to the final point of the lift before dropping the bar. This is a relatively simple phase, with the main goal to maintain stability in the recovery. The key is to prevent the bar from moving forward or backward while you’re standing up. The best way to do this is to use 1-2 shuffle steps with your front foot, then one step forward with your back leg.
This recovery method helps prevent any big steps in either direction that result in the barbell moving laterally. It’s much less likely you’ll miss the lift by taking large, unstable steps. Often lifters will take a big step forward with the back leg, causing the bar to drift forward, sometimes missing the lift at the last moment. Less often, but still happens is taking a big step back with the front leg and missing the lift behind or losing stability.
To work on this, practice pausing in your split position for two seconds each rep to stabilize and give yourself time to remember how to recover correctly. You can also use jerk recovery to isolate and practice just the recovery phase of the lift. (PLUS you’ll be able to go heavier than you could jerk, which is great for confidence in your overhead strength.)
Applying Your Technique Work In Training
We covered a ton of information today, which can leave a lot of people feeling confused about where to start. If you’re brand new to the Olympic lifts, I recommend checking out my FREE beginner weightlifting program. This will take you from never-touched-a-barbell to feeling confident and strong in your snatch and clean and jerk!
If you’re already training the clean and jerk but want to work on each of these phases, then pick out which phase you need to work on, and try the drills I mentioned for each phase. You can make a ton of progress with some periodic, intentional work, either before or after your normal training sessions.
Sample Workout
Double Pause Clean + Double Pause Jerk
Double Pause Clean: pause above the knee and pause in the power position, then finish the clean as normal.
Double Pause Jerk: pause at the bottom of the dip and pause in the split position
3x (3+3) at 60%
3x (2+2) at 65%
1x (1+1) at 70%
1x (1+1) at 75%
1x (1+1) at 80%
The lighter volume work here will give you plenty of reps to practice, before applying the new techniques you learn on the heavier sets. Give this workout a try and tag me @bigbendstrength on Instagram, Tiktok, and YouTube.
Find Your Perfect Training Plan
Sometimes all you need to reach your destination on your fitness journey is an expert guide. Look no further, we've got you covered. Browse from thousands of programs for any goal and every type of athlete.
Try any programming subscription FREE for 7 days!
Related Articles
You May Also Like...

The Best Suggested Swaps for 6 Common Exercises
You’ve programmed the perfect session… only for your athlete to DM you five minutes before training: “Hey coach, the squat racks are all taken.” “My gym doesn’t have that piece of equipment.” “My knee is feeling a little spicy today.” Exercise swaps are a normal part...
6 Best Landmine Exercises for Full Body Strength
Although typically used for simple core and functional movements, the landmine is an amazingly versatile tool that can be used as a primary exercise for many muscle groups. If you’re looking for a new way to build overall strength and power, give these 6 effective...

What Is the RPE Scale and How Do We Use It?
If you’re familiar with strength training, you’ve probably heard someone say… Go until it feels tough! PUSH HARDER! …but what does this really mean? How is it possible to quantify words like “tough” or “hard?” How do you know when a set is heavy enough to produce...
The Best Suggested Swaps for 6 Common Exercises
You’ve programmed the perfect session… only for your athlete to DM you five minutes before training: “Hey coach, the squat racks are all taken.” “My gym doesn’t have that piece of equipment.” “My knee is feeling a little spicy today.” Exercise swaps are a normal part...
6 Best Landmine Exercises for Full Body Strength
Although typically used for simple core and functional movements, the landmine is an amazingly versatile tool that can be used as a primary exercise for many muscle groups. If you’re looking for a new way to build overall strength and power, give these 6 effective...

Want more training content?
Subscribe


For Coaches
For Athletes
About
Support
Training Lab
Access the latest articles, reviews, and case studies from the top strength and conditioning minds in the TH Training Lab!
Made with love, sweat, protein isolate and hard work in Denver, CO
© 2026 TrainHeroic, Inc. All rights reserved.