Turn good-bye into see you later: re-market churned athletes and failed trials with TrainHeroic and Zapier
Coach Development | UncategorizedRunning a reccuring revenue business like an online training membership requires more than filling the top of your funnel. Churn, if left unchecked, can easily drop your take-home revenue from month to month.
You might be asking, “what can I do about churn?” Luckily, the answer might surprise you. By delivering the right message to your customers who churn from your training community at the right time, you can save many more customer relationships than you might think. And, if you automate the work, it won’t require you to spend all your time sending personalized messages to every member.
We’ve made this possible by integrating our platform with Zapier.
We estimate the full setup following this guide to take roughly 1.5 hours.
Buckle in, do this work at a laptop or desktop, and get ready to automate like the pros.
// save failed trials and churned customers with trainheroic and zapier
It’s an unfortunate truth, running a recurring subscription online training business means your customers (athletes) can churn at any time, and without warning.
When it comes to your training communities in the TrainHeroic Marketplace, one of two scenarios can happen:
- An athlete completes their free 7-day trial and decides not to move forward (does not convert)
- An athlete who was a member of a training community decides to leave (cancels subscription)
No matter which scenario it is, both can occur for similar reasons. It could be that they have an injury preventing them from training, the timing wasn’t right, or the programming wasn’t the right fit for their goals.
The good news is that just because the athlete canceled or didn’t convert, doesn’t mean they aren’t interested in training with you – this is a case where “it’s not you, it’s me” might actually be true.
We all know how crazy life can get. Sometimes people have every intention to get the most out of a product or service throughout their trial or subscription, but life gets in the way.
Maybe they felt like the training program was too easy or too advanced for their current level. This would indicate that it wasn’t you as a coach, but the specific programming wasn’t right for them.
It can be difficult to understand exactly why an athlete chooses to cancel. In a future guide, we’ll teach you how to automate an exit survey that will give you quality insights into the reasons you’re experiencing athlete churn. In the meantime, when reaching out it’s important to take into account the different reasons someone may have for canceling.
Being aware of those reasons allows you to address them and overcome them in your messaging.
This will increase your chances of winning them back.
Here’s what we recommend when an athlete cancels or doesn’t convert: set up a series of automated emails that include the following:
- Let them know about other training communities you coach that are focused on different skills or levels of ability. Or, let them know about stand alone programs you offer for sale that allow for a more self-paced start and end date.
- Encourage them to follow you on social or subscribe to your blog to keep them engaged with you and top of mind
- Add delays to your emails so you can continue to follow up with them and catch them at a time when they are ready to train again
// Email copy and creative: creating win-back campaigns that work
Our recommended email sequence consists of five emails sent over 60 days. Here are the themes of each email that we’re going to build for our fictional gym, Doug’s Gym.
Triggering Event: Athlete cancels or doesn’t convert
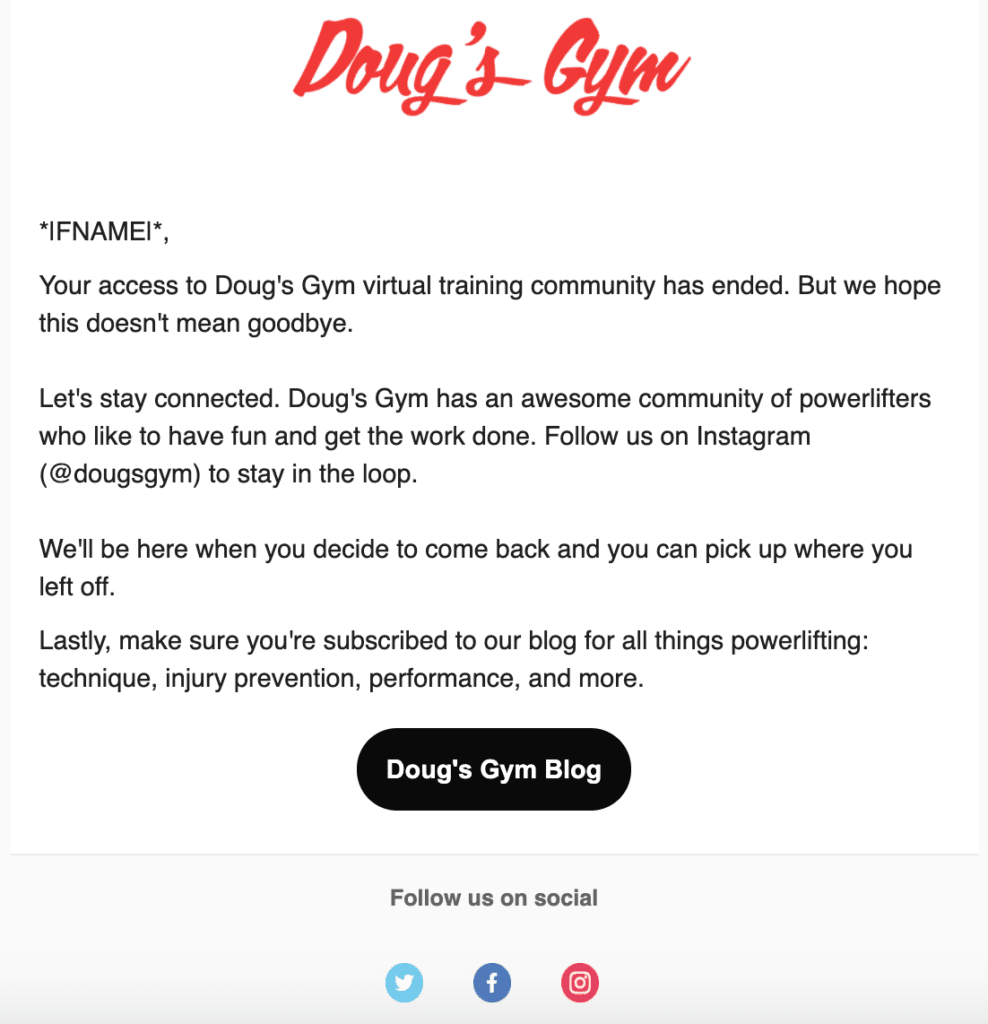
Day 1: send a “we’re sorry to see you go” email and include ways to stay in touch
Tip: Ask them to subscribe to your blog or follow your social media accounts
Day 3: send email with your other available teams/programs
Tip: Let them know the difference between training communities & programs
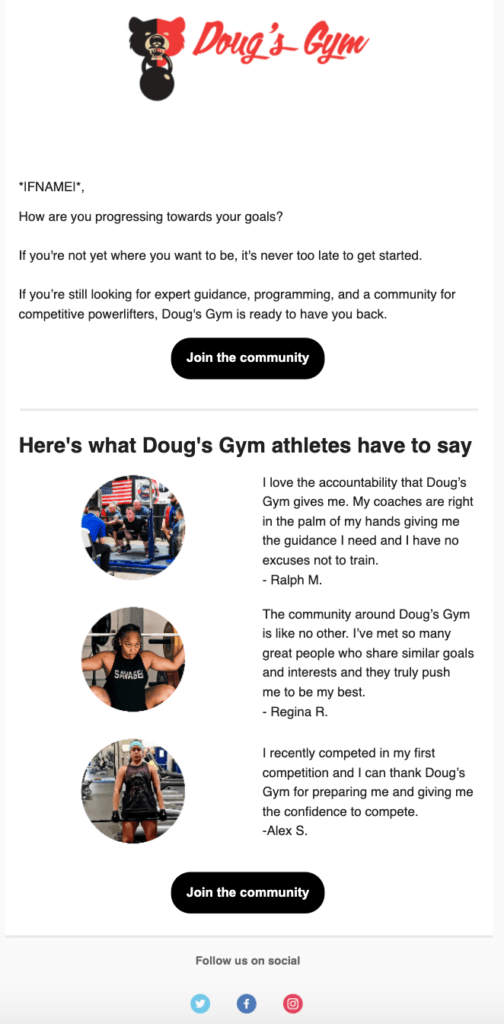
Day 30: send check-in email and include reviews from your clients
Tip: Put a comment box on your Instagram story to get quick and authentic feedback
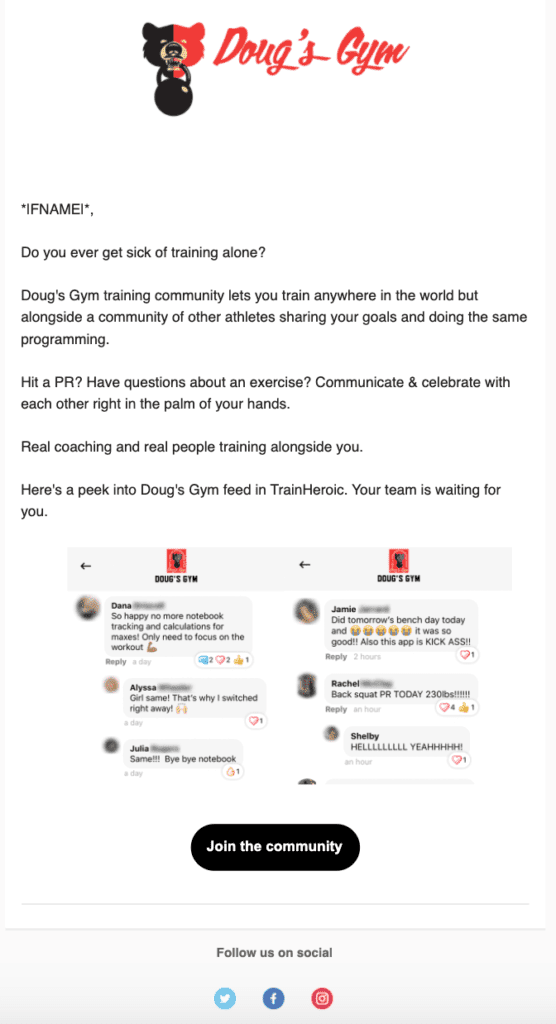
Day 45: feature conversations in TH Chat to highlight the community
Tip: Browse your TH Chat feed and screenshot great conversations to highlight what potential clients are missing out on
Day 60: send email with your other available teams/programs
Tip: Last chance effort, drive the sale home by talking about what makes you unique from your competition
To let you in on a little secret, here at TrainHeroic we have an automated email sequence that sends to coaches who don’t convert after their free 14-day trial. Our series consists of 6 emails and sends up to 75 days after the free trial ends. Here are some of the topics we include:
- Subscribe to our blog to stay in touch
- Recommend popular blog articles
- Touch on pain points
- Address price concerns
- Highlight app features
- Feature customer reviews
Automating this sequence has allowed us to successfully win-back coaches because we remained engaged with them while they weren’t actively using the app, let them know how we will make their life easier, and reached them at a more convenient time.
The moral of the story, don’t give up! Just because someone doesn’t convert the first time doesn’t mean that they can’t be a loyal customer in the future.
Now that we’ve talked strategy, let’s build the automation using Zapier & Mailchimp.
Build and design your emails
Below, we’re going to lay out recommended email topics & suggested copy. As you read through, begin building all five of your email templates in MailChimp. If you’re starting from scratch and need help getting started with templates, follow this MailChimp guide.
Day 1
Use our template (including product images) as a starting point with this link. Note: you’ll need a MailChimp account to access this. Don’t forget to edit all links including social.
Day 3
Use our template as a starting point with this link. Note: you’ll need a MailChimp account to access this. Don’t forget to edit all links including social.
Day 30
Use our template (including product images) as a starting point with this link. Note: you’ll need a MailChimp account to access this. Don’t forget to edit all links including social.
Day 45
Use our template (including product images) as a starting point with this link. Note: you’ll need a MailChimp account to access this. Don’t forget to edit all links including social.
Day 60
Use our template (including product images) as a starting point with this link. Note: you’ll need a MailChimp account to access this. Don’t forget to edit all links including social.
// creating email automation with TrainHeroic, Zapier, and MailChimp
Now that you have your templates built, you’re ready to set up the automated campaign.
It’s important to note that there are two events happening here, Athlete Cancels Subscription & Trial Didn’t Convert. These are two separate Zapier triggering actions. For simplicity, we are going to send the same email sequence to athletes who trigger either event.
In the next steps, we will show you how to do that.
Set up a tag in MailChimp
As with all of our guides, the email automation is triggered when tags are added to a specific user. So let’s create a new tag to label athletes who cancel & don’t convert from a trial.
- To get started, select Audience in the left navigation then Tags.
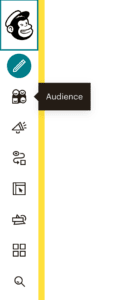

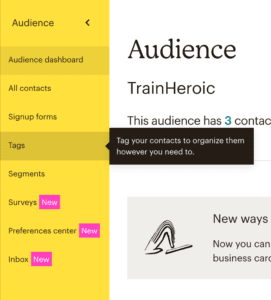


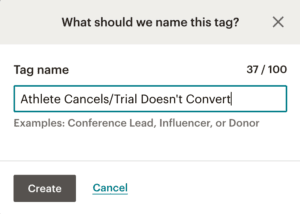
3. Give your tag a name. Since we are triggering one email sequence off two events, we are going to name ours Athlete Cancels/Trial Doesn’t Convert. Then select Create.
If you decide that you’d like to trigger a different email sequence for each triggering event, you can create two separate tags: one for athlete cancels and one for trial doesn’t convert.

Creating your automated campaign
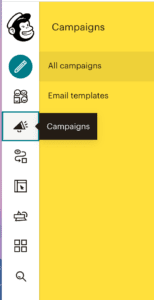
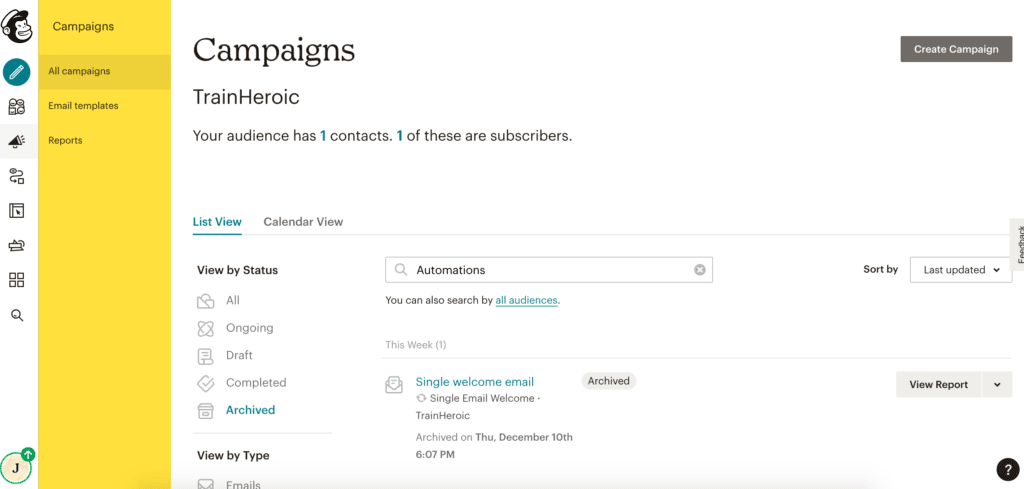
Once your tag is created you’re ready to build your automated campaign.


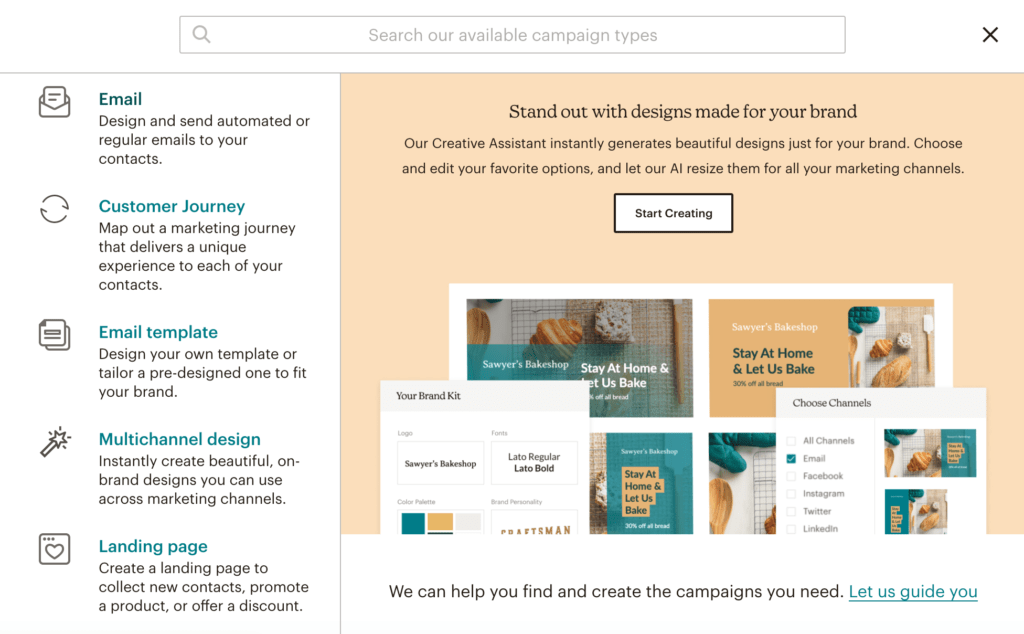

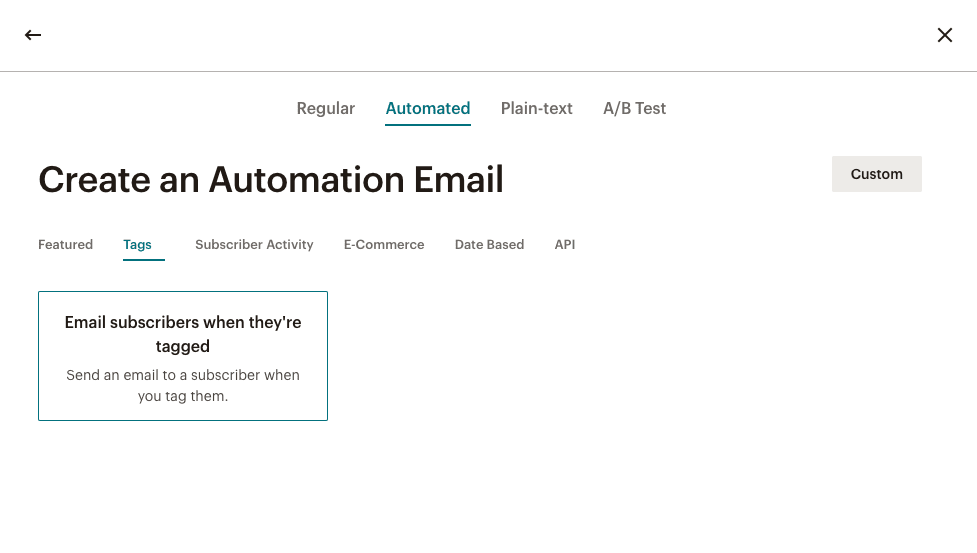

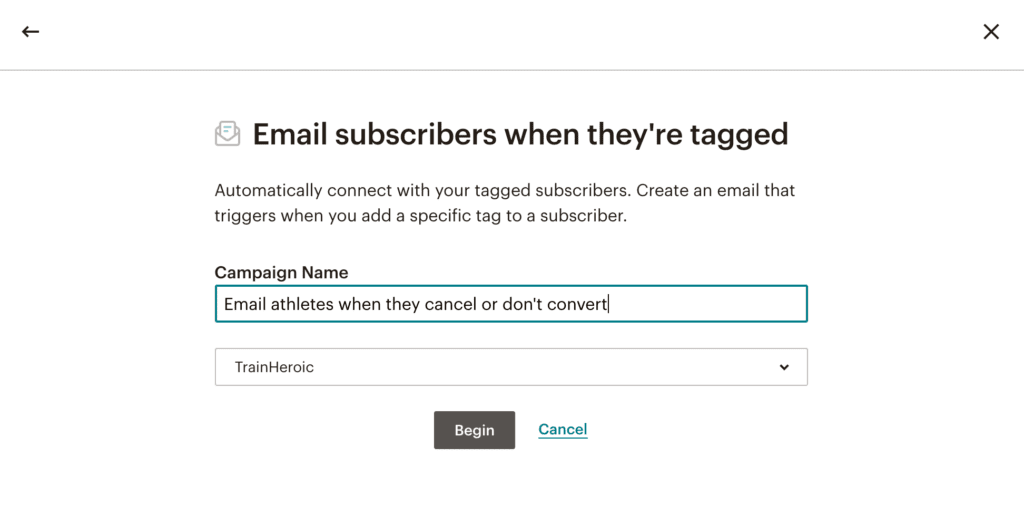

Build your workflow
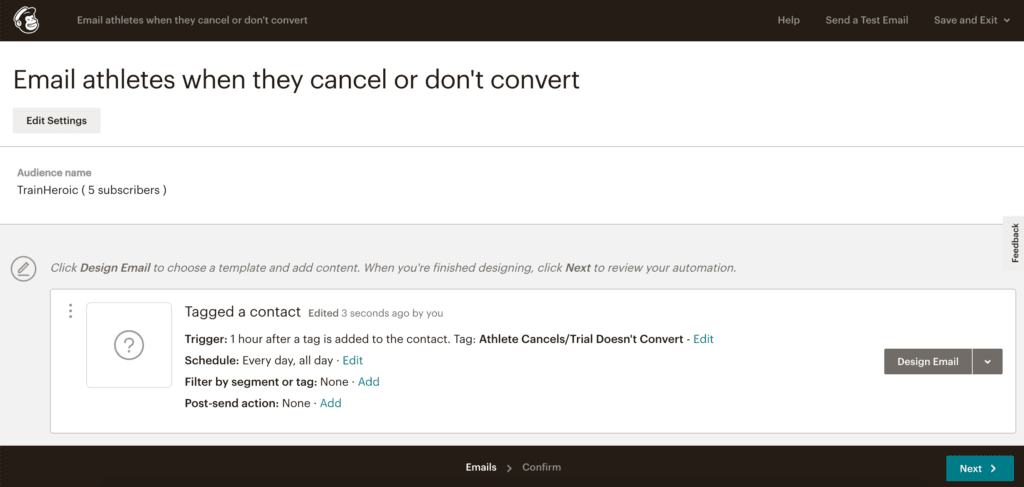
Now we’re going to set up the first of five emails in the sequence.
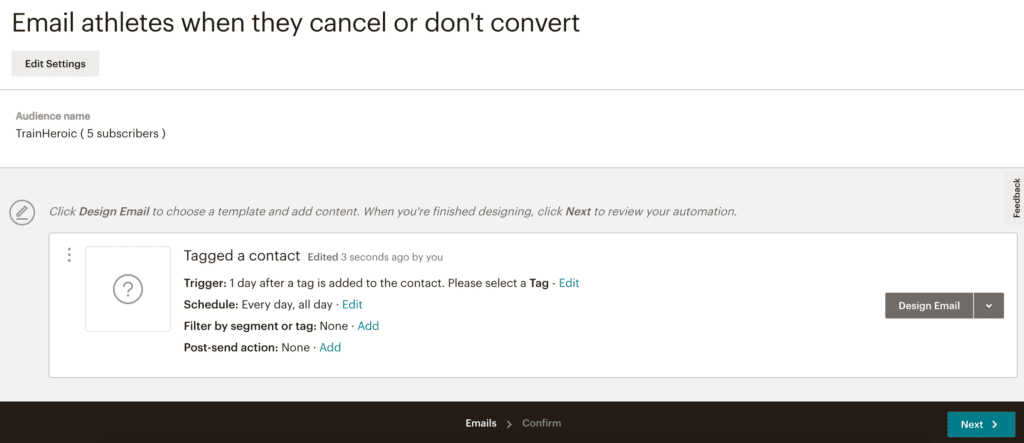

2. Edit the following settings:
- We recommend sending the first email one hour after the event triggers. Change the delay to Wait 1 hour.
- Under Settings, select the tag you just created: Athlete Cancels/Trial Doesn’t Convert. This will ensure that only athletes who have that tag receive this email campaign.
- Select Update Trigger when done


Adding your emails to the workflow

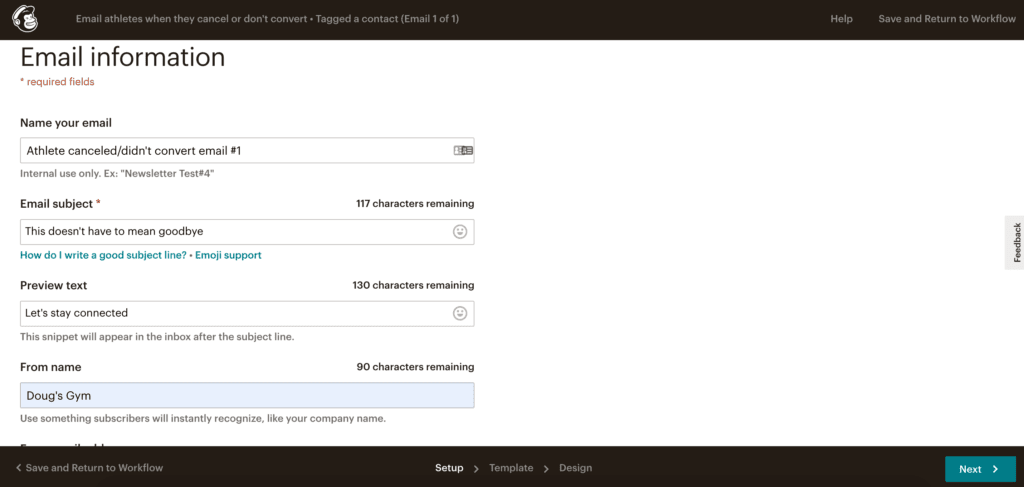
2. Give this email a name and fill in your desired email subject, preview text, from name, and from email address. Then hit Next.




6. To adjust when this email will send, select Edit next to Trigger.


7. Referencing back to the recommended schedule we provided earlier, we’re going to add a 2-day delay to the second email. Then select Update Trigger.


8. Select Design Email to select your email template.


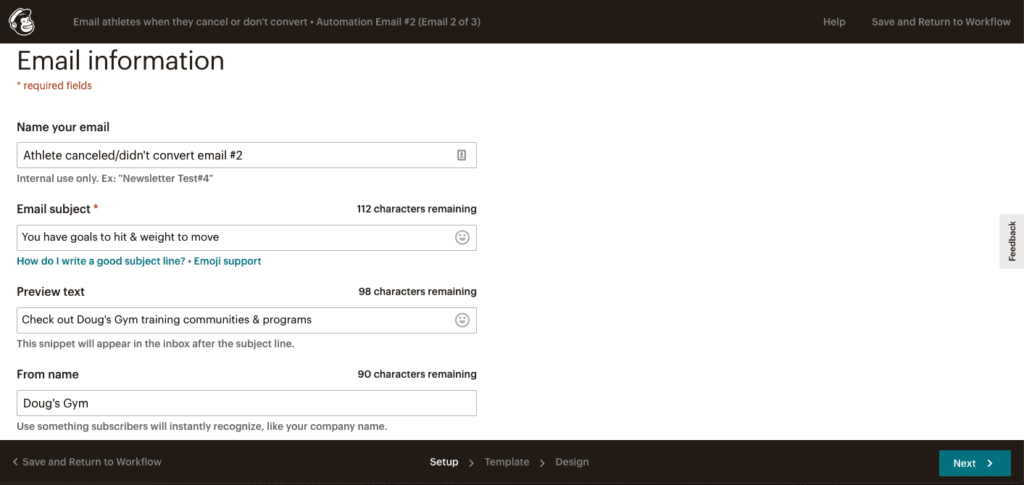
9. Give the email a name and fill in your desired email subject, preview text, from name, and from email address. Then hit Next.

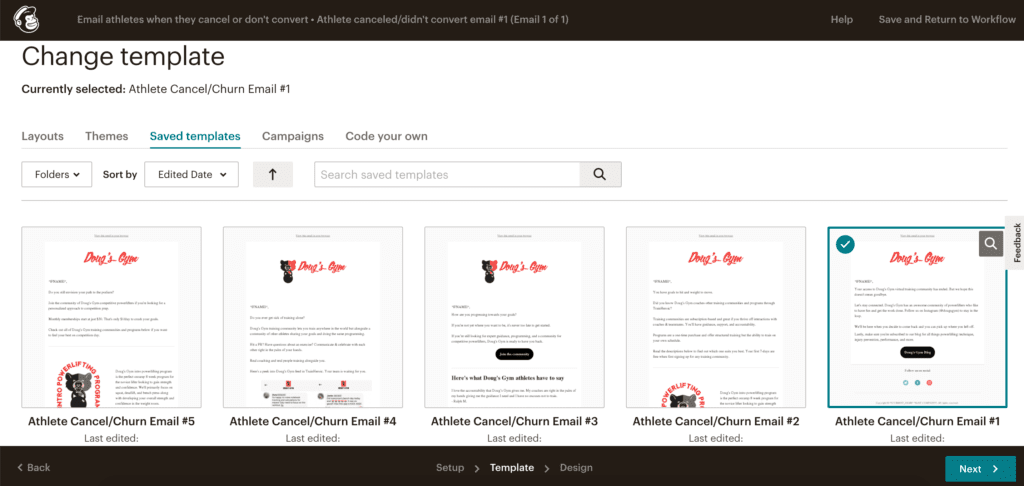
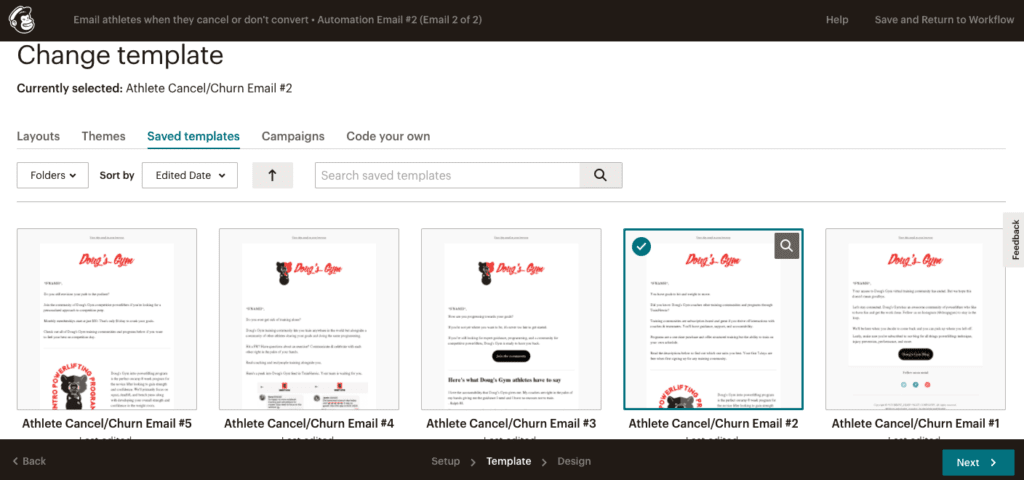
10. Click on the Saved Templates tab, find your desired template, then hit Next.

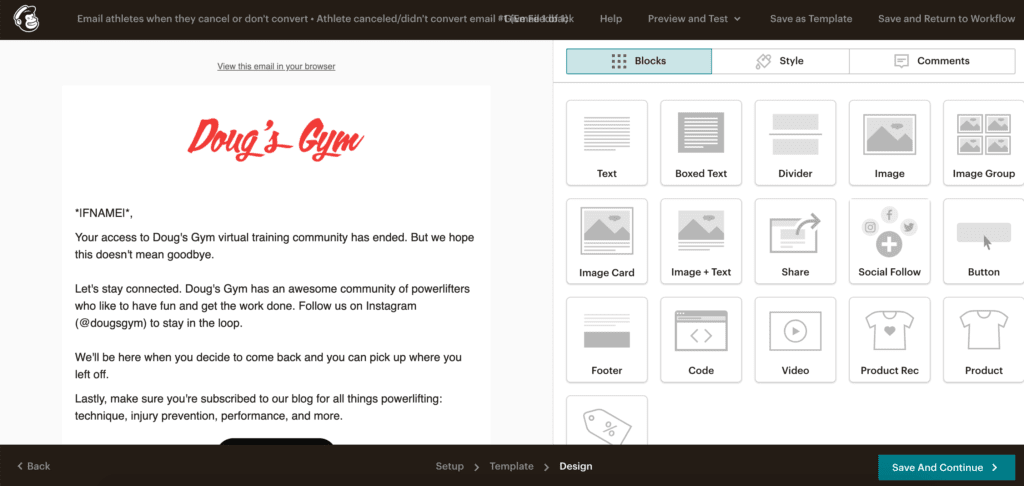
11. Review your template, make any necessary changes, then select Save and Continue when done.
Your second email setup is done. Next, let’s set up the third email in your sequence by selecting Add Another Email.


12. To adjust when this email will send, select Edit next to Trigger.


13. Since we want this third email to send 30 days after the initial event trigger, we’re going to add a 27-day delay. (3 days were accounted for with the first two emails.)
Then select Update Trigger.


14. Select Design Email to select your email template.


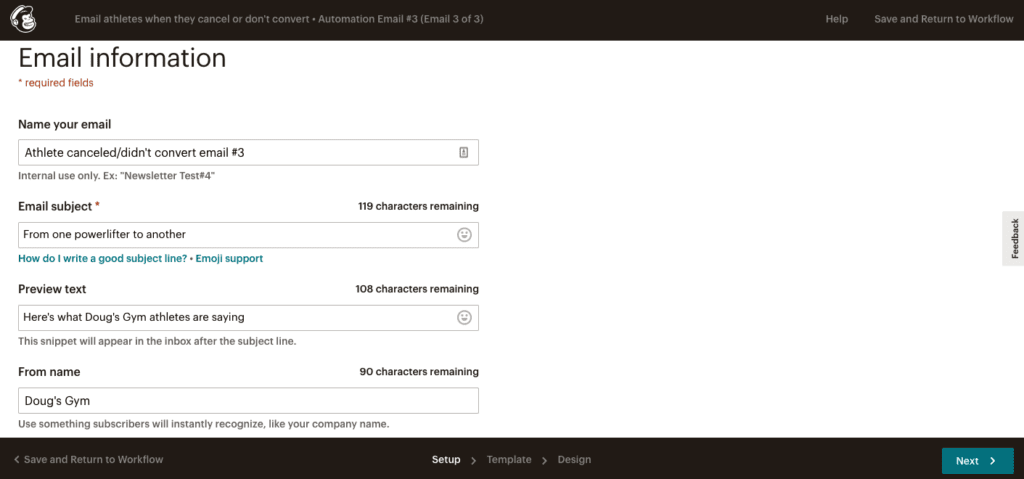
15. Same as before, give the email a name and fill in your desired email subject, preview text, from name, and from email address. Then hit Next.

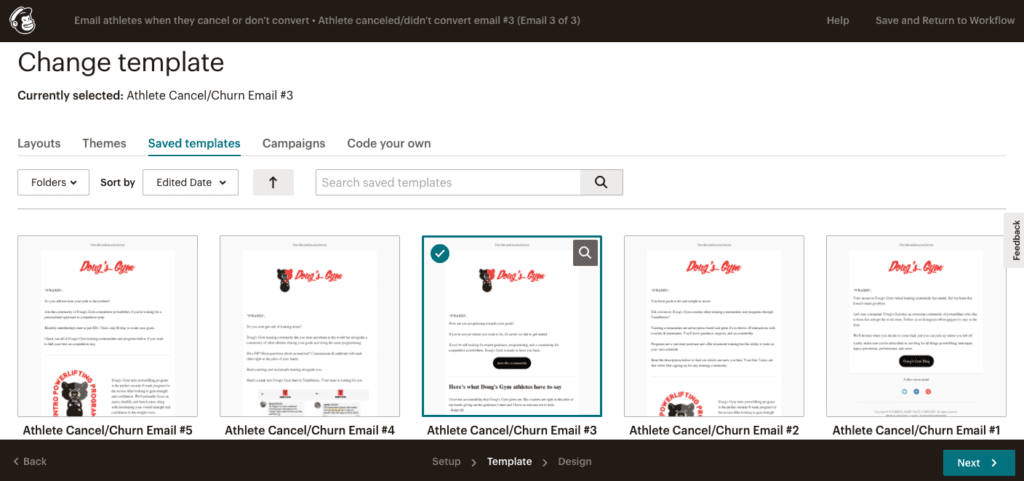
16. Click on the Saved Templates tab, find your desired template, then hit Next.

17. Review your template, make any necessary changes, then select Save and Continue when done.
Your third email setup is done. Next, let’s set up the fourth email in your sequence by selecting Add Another Email.


18. To adjust when this email will send, select Edit next to Trigger.


19. We’re now going to add a 15-day delay so that the email sends 45 days after the initial triggering event.
Then select Update Trigger.


20. Select Design Email to select your email template.


21. Same as before, give the email a name and fill in your desired email subject, preview text, from name, and from email address. Then hit Next.
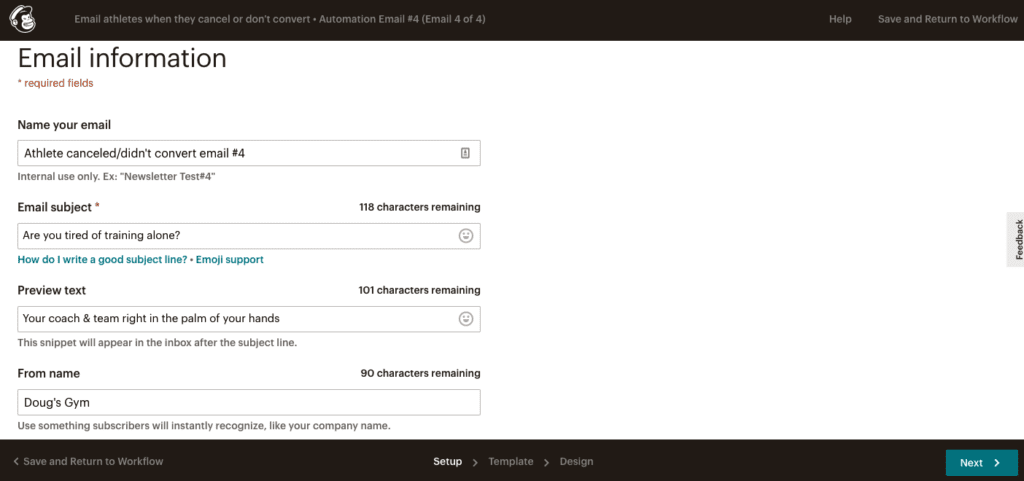

22. Click on the Saved Templates tab, find your desired template, then hit Next.
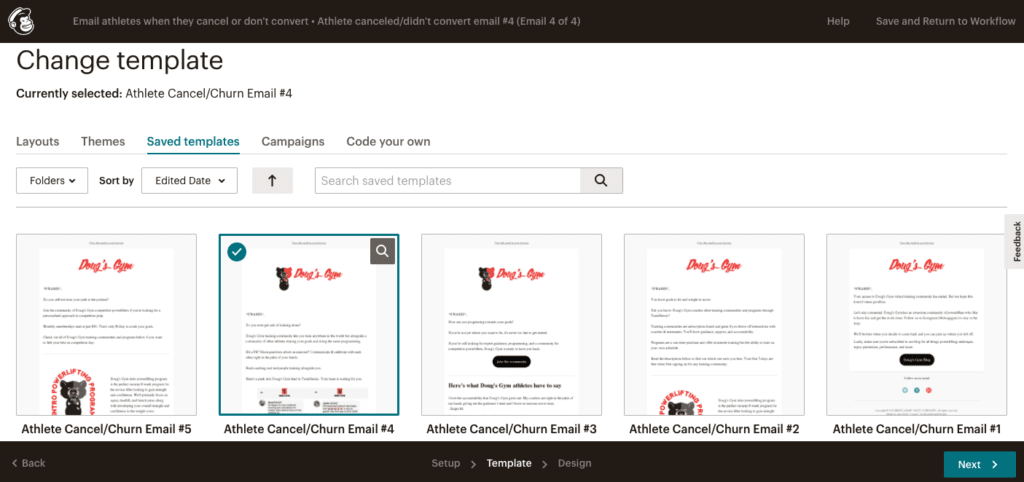

23. Review your template, make any necessary changes, then select Save and Continue when done.
Your fourth email setup is done. Now let’s set up the fifth and final email in your sequence by selecting Add Another Email.


24. To adjust when this email will send, select Edit next to Trigger.


25. Add a 15-day delay so that the email sends 60 days after the initial triggering event.
Then select Update Trigger.


26. Select Design Email to select your email template.


27. Same as before, give the email a name and fill in your desired email subject, preview text, from name, and from email address. Then hit Next.
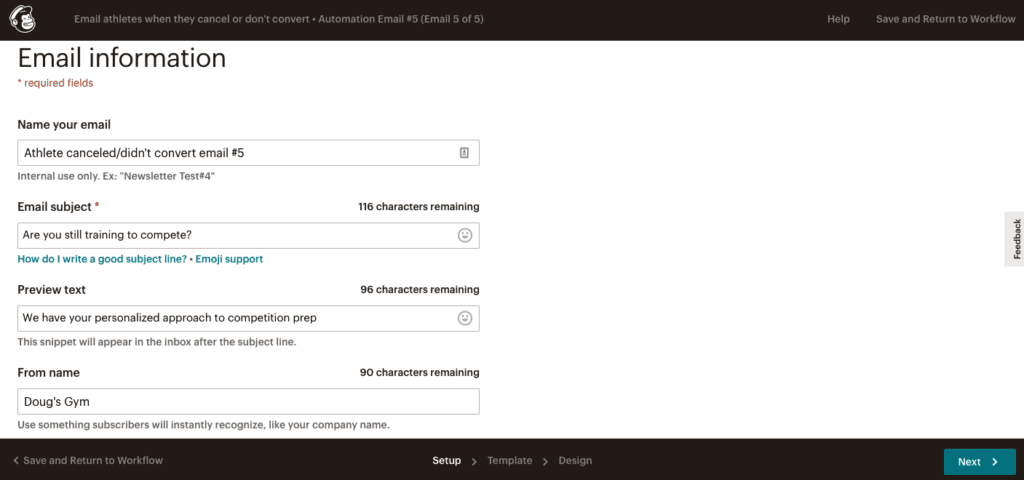

28. Click on the Saved Templates tab, find your desired template, then hit Next.
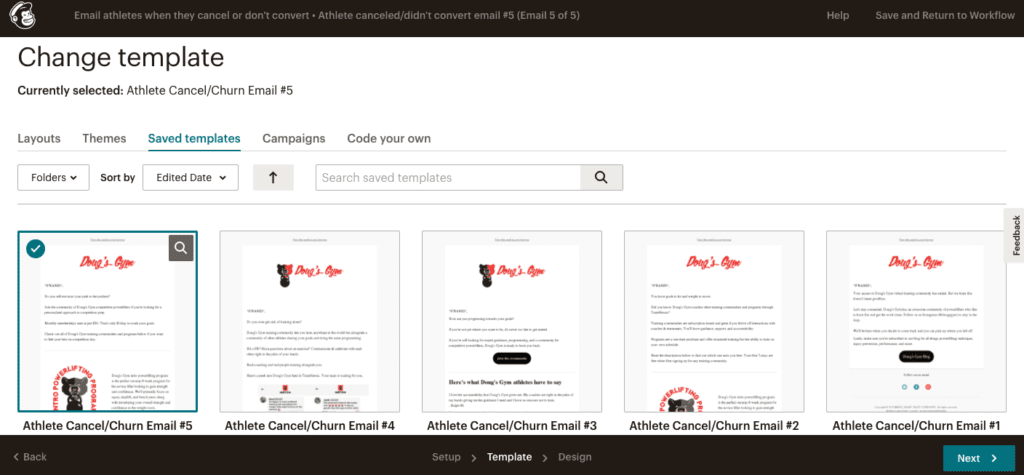

29. Review your template, make any necessary changes, then select Save and Continue when done.
You now have all 5 emails set up in your workflow.
Before going live, you should always send test emails so you can review them and see what they look like in a recipient’s inbox.
Select Send a Test Email in the top right corner.


30. Select Test all 5 emails and decide who should receive the test emails. Then hit Send Test.
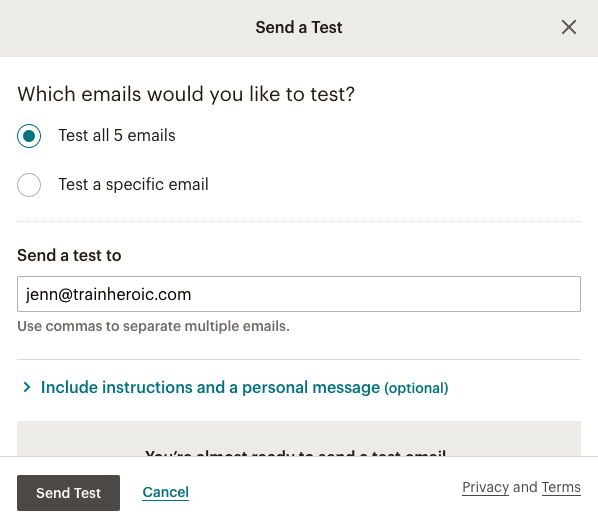

31. You will instantly receive all emails in the campaign regardless of the delays we set. Head over to your inbox to review all 5 emails. Make sure the subject line, design, & layout meets your expectations. Sometimes test emails can end up in spam, so check your spam folder if you’re not seeing them.
If you’d like to make any adjustments, select Design Email to edit any template.
Once you’re ready to move forward, hit Next in the bottom right corner.
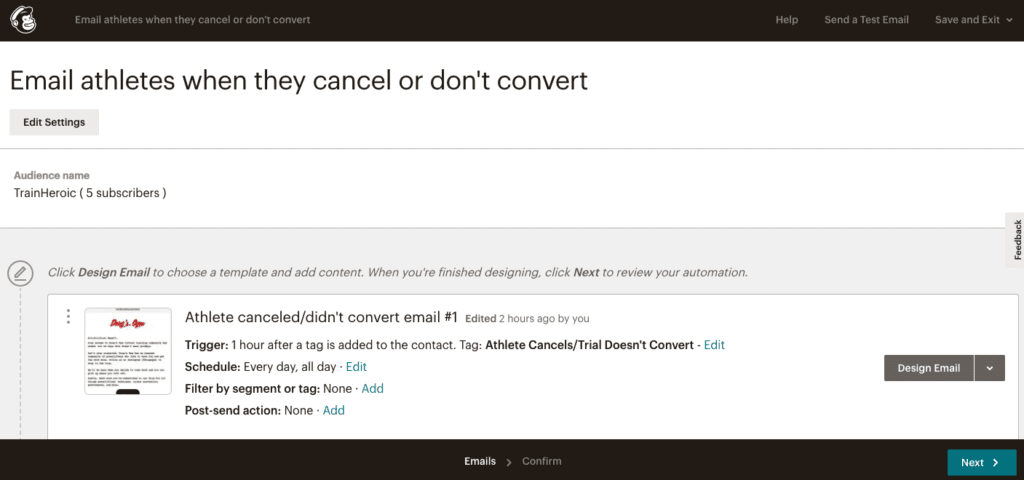

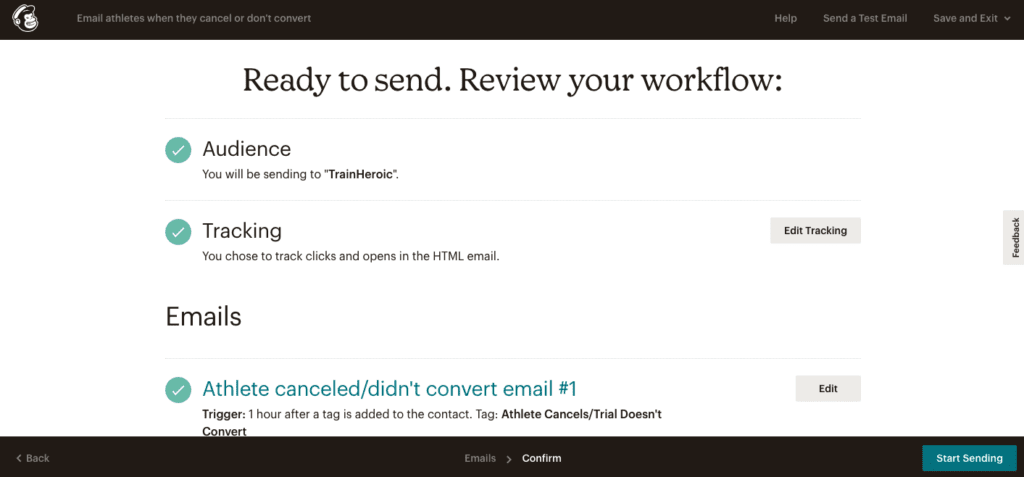
32. You’ll see a recap of the workflow you just built. Here you can review the audience, tracking, and emails that will send in this workflow. Make sure everything looks correct. If not, select Edit next to the section that needs to be adjusted.
Once you’re ready to launch, select Start Sending in the bottom right corner.

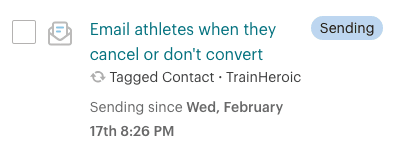
33. You’ll notice that this campaign is labeled as Sending, which indicates that it’s running. Now, anytime a user is tagged with “Athlete Cancels/Trial Doesn’t Convert,” this workflow will trigger!

// Setting up your zap: connecting zapier, trainheroic, and mailchimp
Now that your campaign is actively sending in Mailchimp, let’s automate it through Zapier.
As mentioned before, we’re working with two separate triggers. This means that we have to set up two different zaps, however, they will both trigger the same campaign in Mailchimp.
Building the “athlete cancels team subscription” Zap
- Log into Zapier and select Make A Zap.


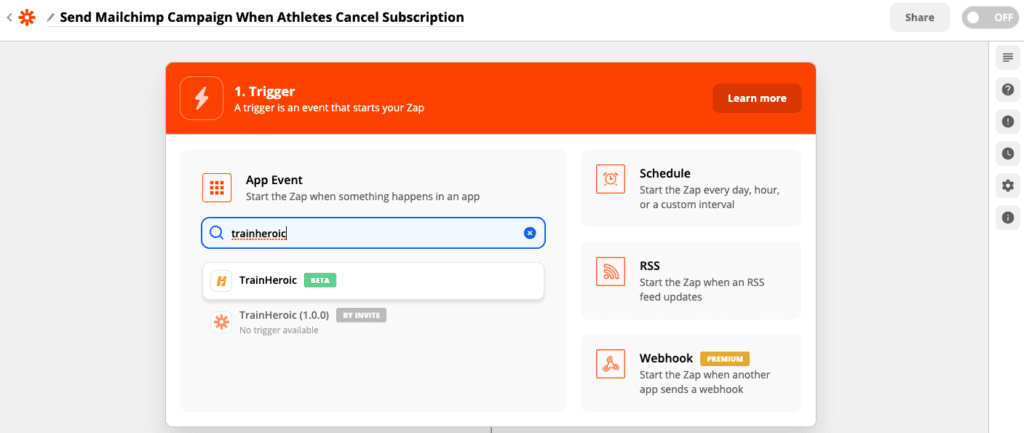
2. Give your zap a name. We’re naming ours Send Mailchimp Campaign When Athlete Cancels Subscription. Then search for and select TrainHeroic as your starting trigger.

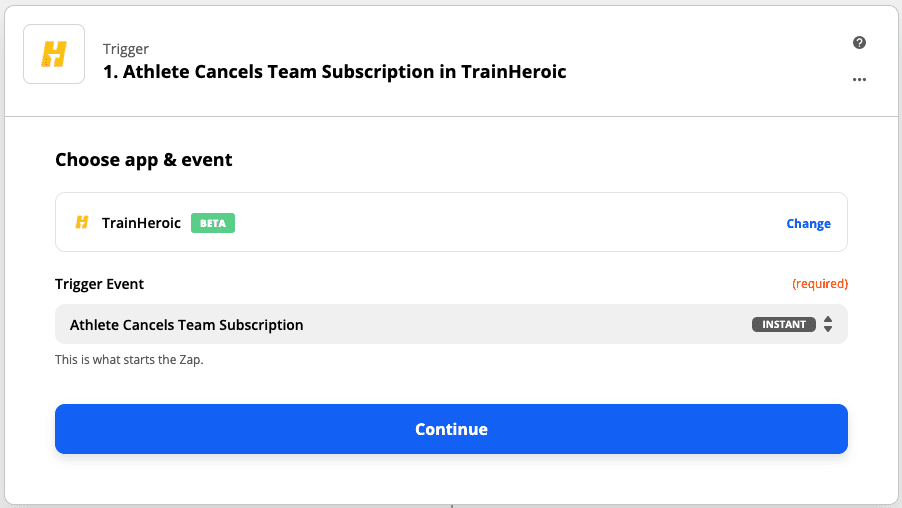
3. Our triggering event is a cancelation, so select Athlete Cancels Team Subscription. Then select Continue.

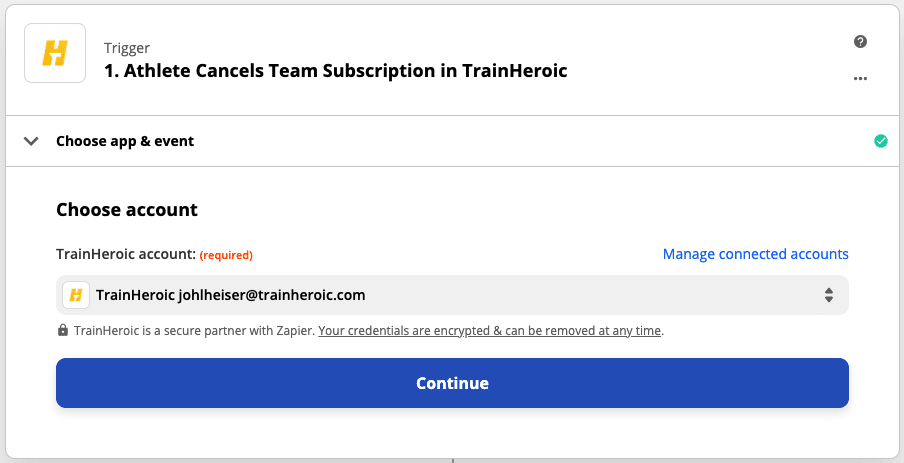
4. Next, select your TrainHeroic account. If you haven’t previously connected to your TrainHeroic account then you will be prompted to log in. Hit Continue.

5. Select Test trigger.
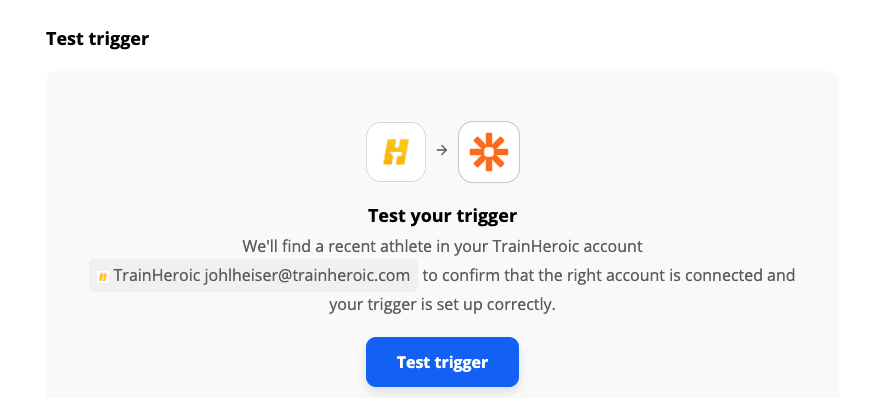


6. Next, Zapier will search for an athlete on your team to be used for testing. We recommend choosing yourself. That way, you will be on the receiving end of emails during testing and one of your actual athletes will not receive an email out of context. Once identified select Continue.
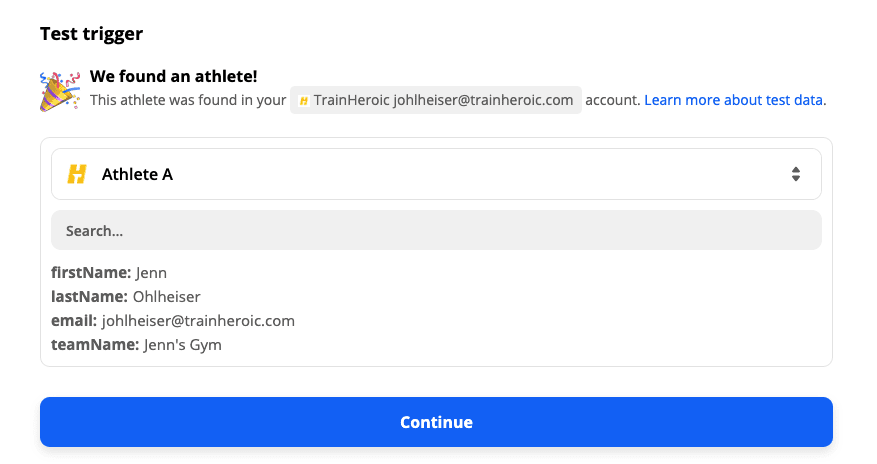

7. Since we are sending this trigger to Mailchimp, search for and select Mailchimp.
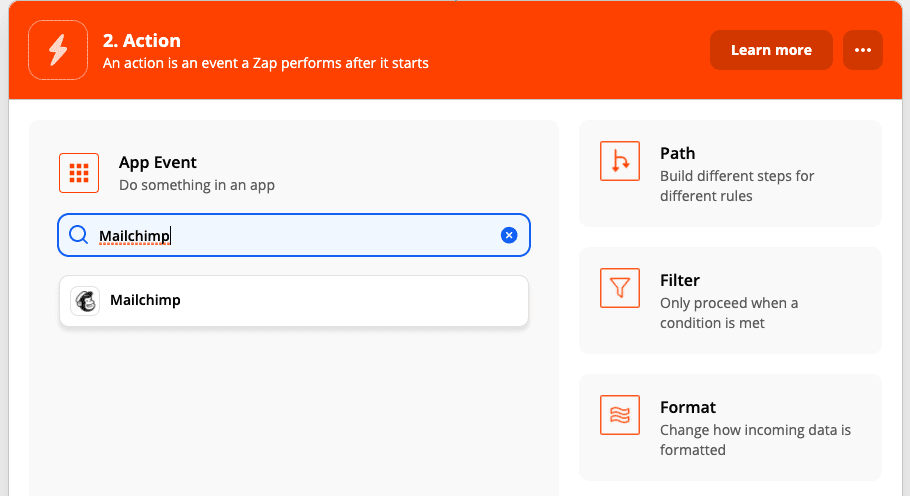


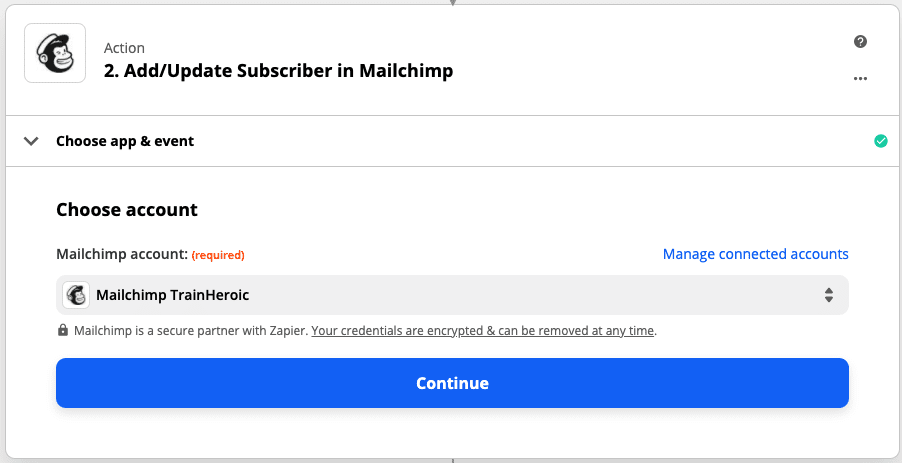
9. Next, connect to your Mailchimp account. Then hit Continue.

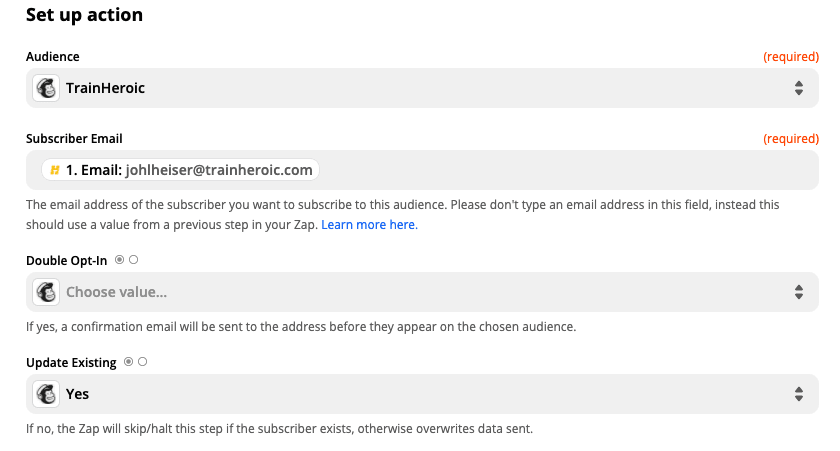
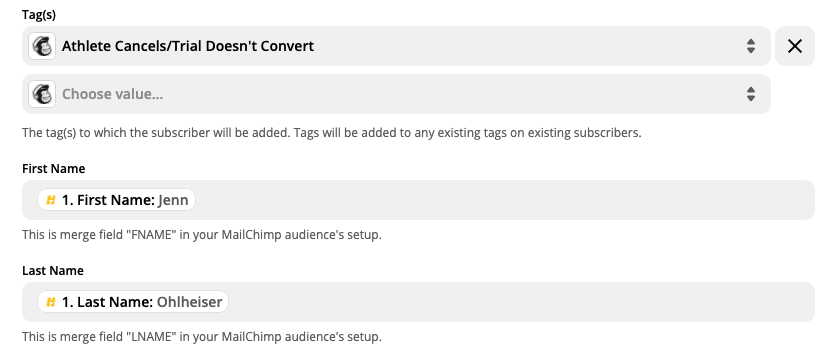
10. To set up your action, fill in the following fields:
- Audience: Select your Mailchimp audience
- Subscriber Email: Grab your test athlete’s email from the dropdown
- Update Existing: Make sure this says Yes
- Tag(s): Select your Athlete Cancels/Trial Doesn’t Convert tag from the dropdown. (This is how the tag is assigned to the athlete)
- First Name: Select your test athlete’s first name from the dropdown
- Last Name: Select your test athlete’s last name from the dropdown
- Team Name (optional): If you have multiple teams and already created a Team Name custom field in Mailchimp, select your test athlete’s team name from the dropdown
- Select Continue when done


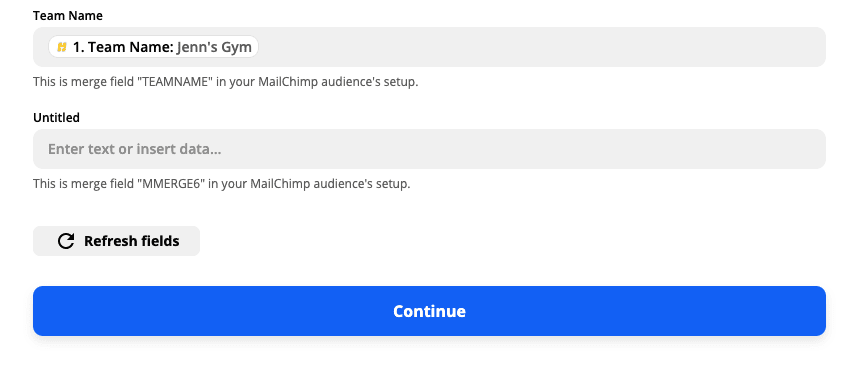

11. Now you’re ready to test the action you set up. Hit Test & Review.
You should receive a green banner indicating a subscriber was successfully sent to Mailchimp.


12. Before turning on the zap, let’s look at what was just happened in Mailchimp.
In Mailchimp, click on Audience then All Contacts. You should see the tag Athlete Cancels/Trial Doesn’t Convert attached to the athlete used in testing.


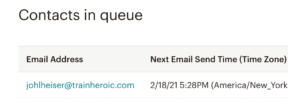
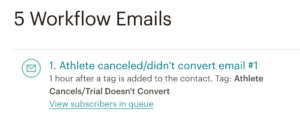
13. Now, head over to your Email Athletes When They Cancel Or Don’t Convert campaign in the Campaigns tab and View subscribers in queue. You should see your email waiting to be sent. It’s in the queue because we added a 1-hour delay when setting up this campaign.


14. Now that we confirmed the automation is properly working, head back to Zapier and select Turn on Zap to launch.


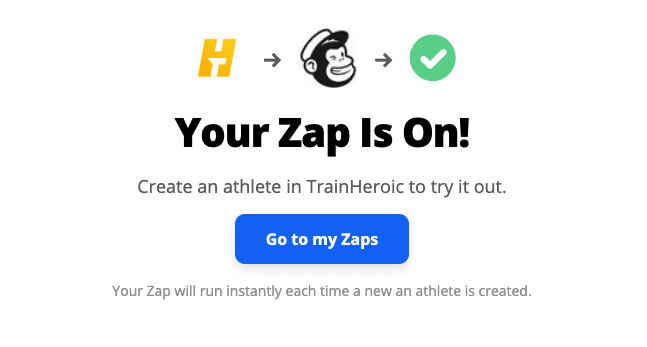
15. You’ll receive a confirmation message letting you know that the zap is turned on


Building the “trial did not convert” Zap
- Log into Zapier and select Make A Zap.


2. Give the zap a name. We’re naming ours Send Mailchimp Campaign When Athlete Trial Doesn’t Convert. Then search for and select TrainHeroic as your starting trigger.
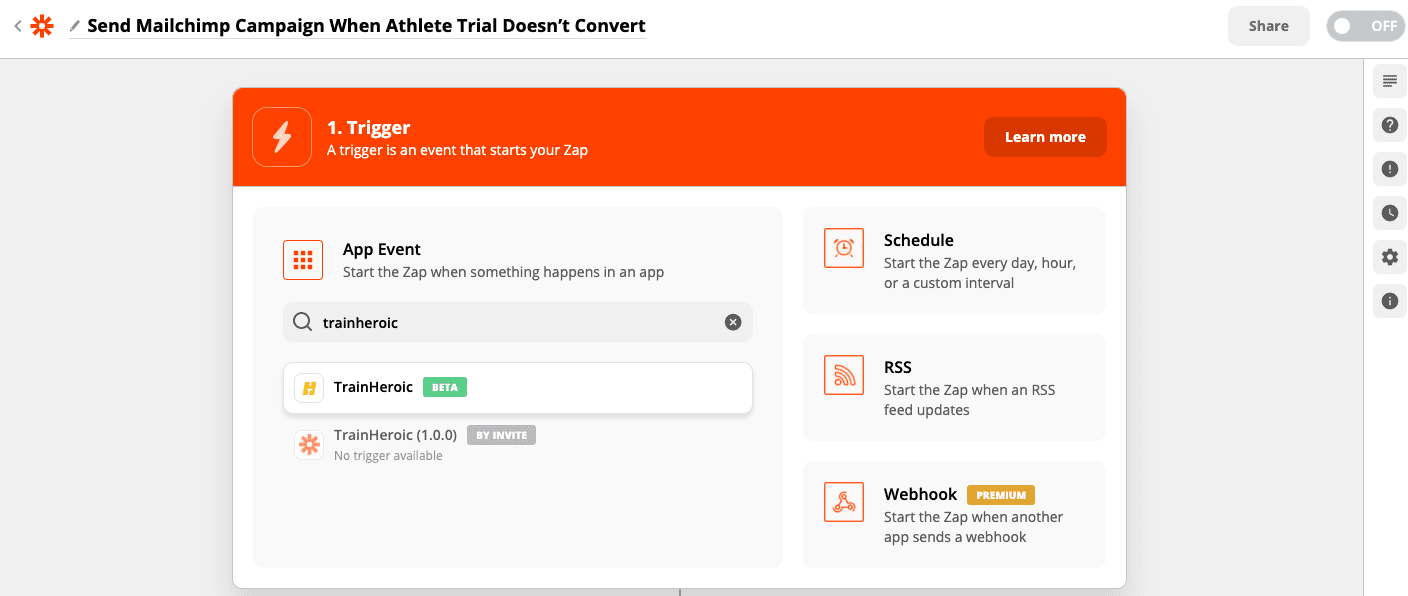

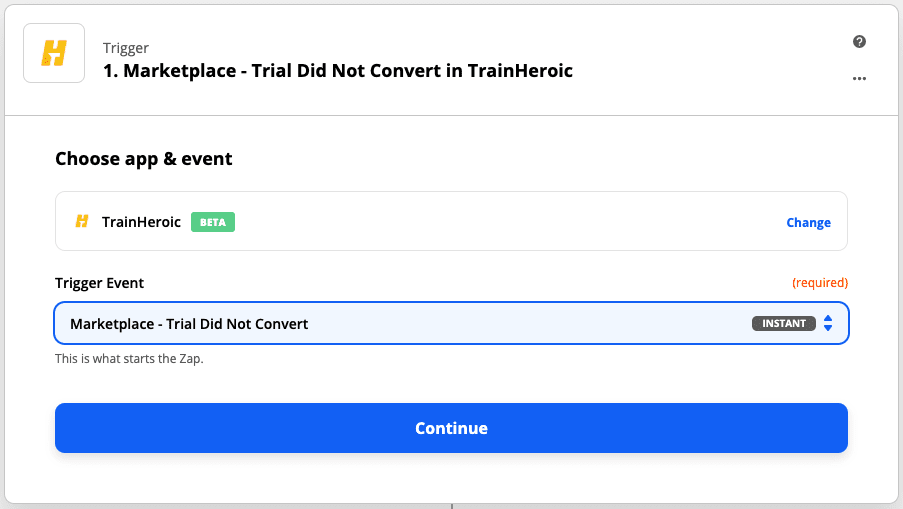
3. Our triggering event is a trial that didn’t convert, so select Marketplace – Trial Did Not Convert. Then select Continue.

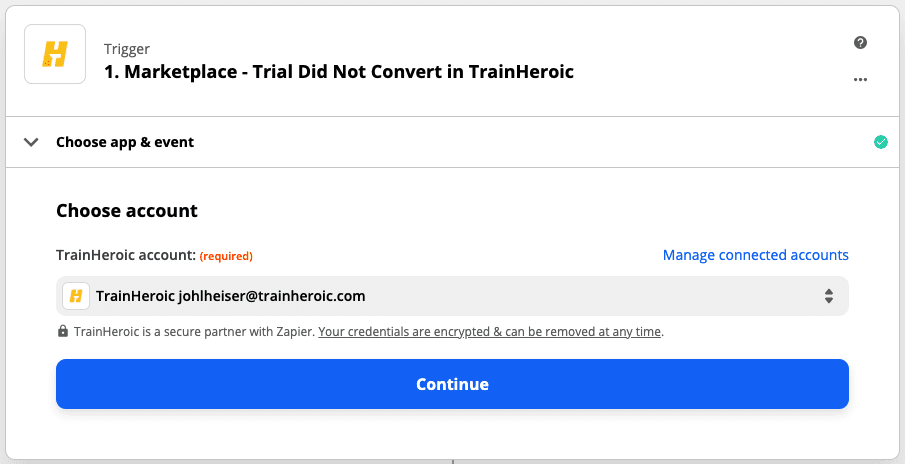
4. Next, select your TrainHeroic account then hit Continue.

5. Select Test trigger.


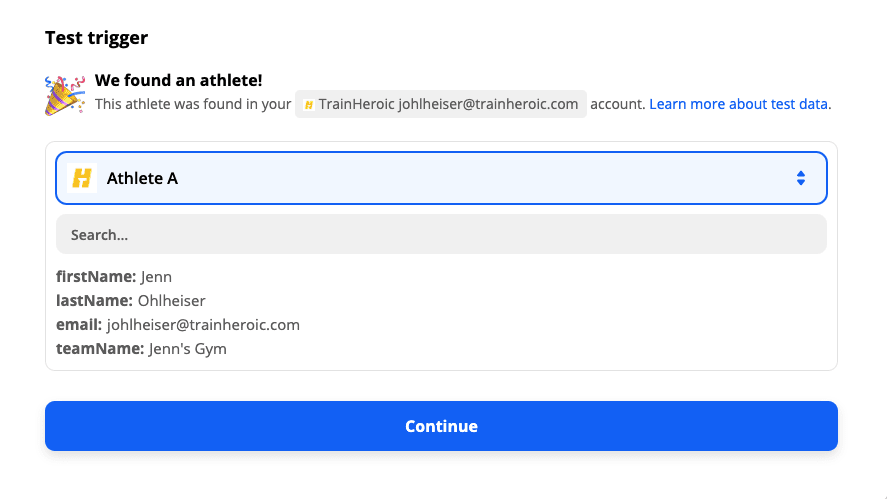
6. Select your test athlete. Zapier will default to the athlete you used in the previous zap we made. Then hit Continue.

7. Since we are sending this trigger to Mailchimp, search for and select Mailchimp.


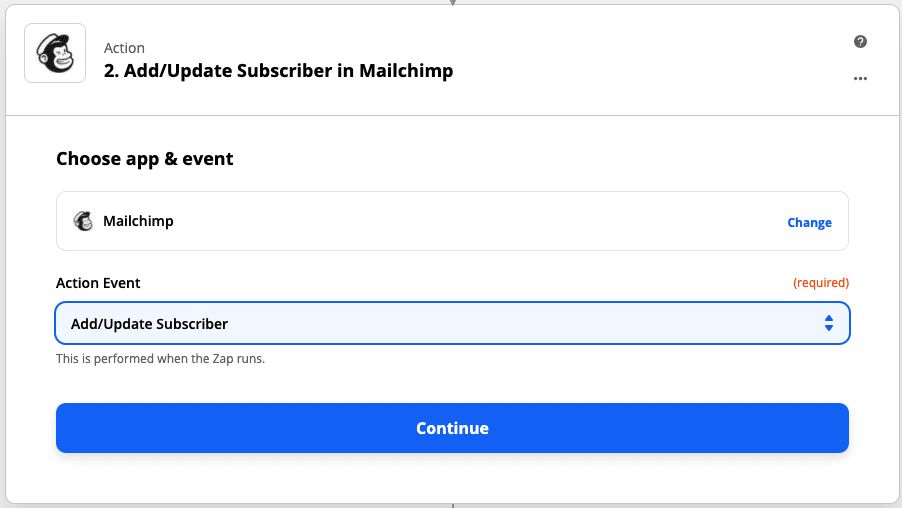
9. Under Action Event, select Add/Update Subscriber. Then hit Continue.

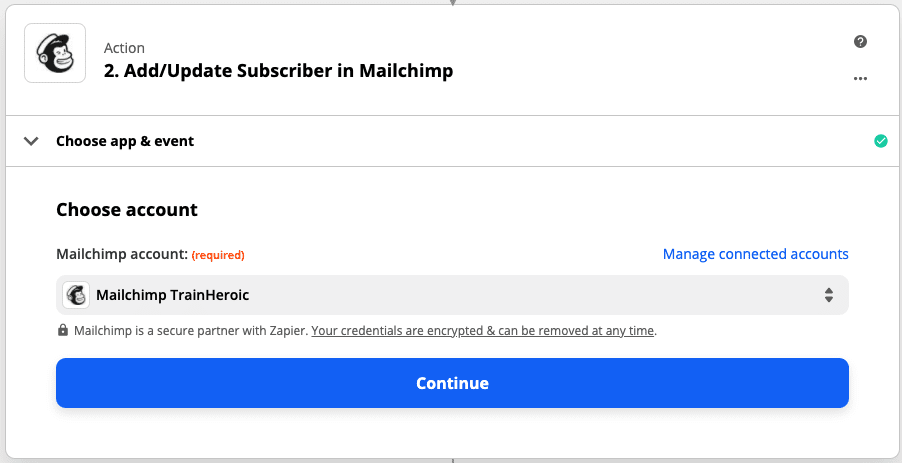
10. Next, connect to your Mailchimp account. Then hit Continue.

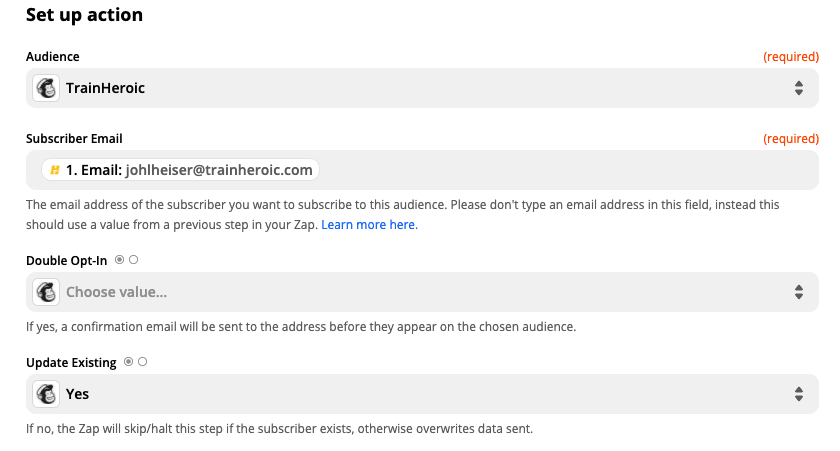
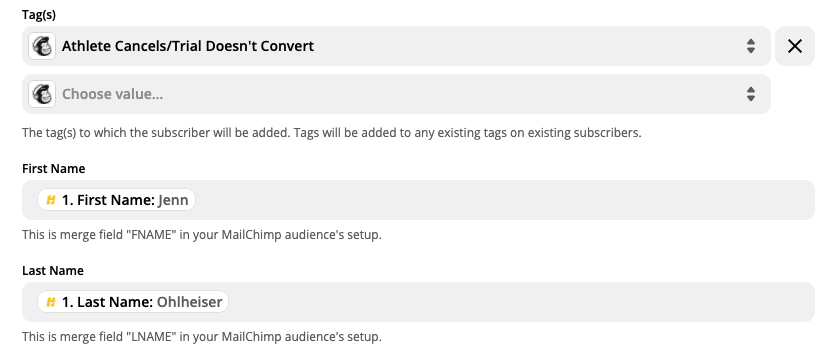
11. To set up your action, fill in the following fields:
- Audience: Select your Mailchimp audience
- Subscriber Email: Grab your test athlete’s email from the dropdown
- Update Existing: Make sure this says Yes
- Tag(s): Select your Athlete Cancels/Trial Doesn’t Convert tag from the dropdown. (This is how the tag is assigned to the athlete)
- First Name: Select your test athlete’s first name from the dropdown
- Last Name: Select your test athlete’s last name from the dropdown
- Team Name (optional): If you have multiple teams and already created a Team Name custom field in Mailchimp, select your test athlete’s team name from the dropdown
- Select Continue when done


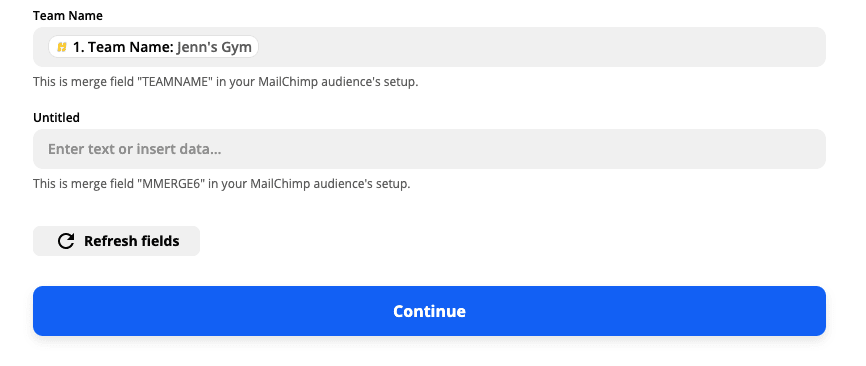

12. Now you’re ready to test the action you set up. Hit Test & Review.
You should receive a green banner indicating a subscriber was successfully sent to Mailchimp.


13. This is normally when we head over to Mailchimp to look for the athlete and tag that was just sent in. However, the athlete and tag were already sent into Mailchimp with the first zap we created. Since the tag was already applied to that athlete, no changes will be made in Mailchimp. You can always go back to the test trigger step and select a different test athlete.


14. Now that we confirmed the automation is properly working, head back to Zapier and select Turn on Zap to launch.


15. You’ll receive a confirmation message letting you know that the zap is turned on


// check in often, measure, and optimize
Coach, you did it. You’ve automated communication to your customers across their lifecycle. From those vital first few days on a trial through re-sell and upsell, you now have a communication machine that is infinitely scalable.
Be sure to check back in on the TrainHeroic blog for more exciting updates as well as tips and tricks to leverage Zapier and TrainHeroic.
READY TO TRY TRAINHEROIC?
Our powerful platform connects coaches and athletes from across the world. Whether you are a coach or trainer looking to provide a better experience for your clients, or you’re an athlete looking for expert programming, click below to get started.
Want more training content?
More coaches and athletes than ever are reading the TrainHeroic blog, and it’s our mission to support them with the best training & coaching content. If you found this article useful, please take a moment to share it on social media, engage with the author, and link to this article on your own blog or any forums you post on.
Be Your Best,
TrainHeroic Content Team
HEROIC SOCIAL
HEROIC SOCIAL
TRAINING LAB
Access the latest articles, reviews, and case studies from the top strength and conditioning minds in the TH Training Lab
